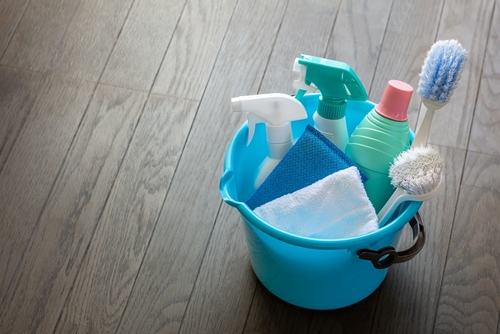
10 Essential Tips for Maintaining a Spotless Commercial Space

Keeping a commercial space clean and organized is essential for creating a welcoming environment for clients and boosting productivity among employees. A well-maintained workplace also helps minimize health risks and fosters a sense of pride and professionalism. Here are ten tips to ensure your commercial space remains spotless and inviting.

1. Develop a Comprehensive Cleaning Schedule

A well-planned cleaning schedule is the cornerstone of any effective cleaning routine. Break down tasks into daily, weekly, and monthly categories to ensure all areas receive the care they need. Here’s a basic breakdown:

  • Daily Tasks: Empty trash bins, sanitize desks and high-touch surfaces, clean restrooms, and vacuum main areas.
  • Weekly Tasks: Dust furniture, clean windows, and mop hard floors.
  • Monthly Tasks: Deep-clean carpets, furniture, and HVAC vents.

Assign specific tasks to cleaning staff or team members, ensuring consistent care that keeps your space looking its best.

2. Stock Quality Cleaning Supplies

Having the right cleaning products and equipment can make a big difference in achieving efficient and effective results. Invest in high-quality supplies tailored to your specific needs:

  • Disinfectants: Essential for high-touch areas to eliminate germs.
  • Microfiber Cloths: For streak-free cleaning on glass, screens, and other delicate surfaces.
  • Floor Care Supplies: Stock appropriate brooms, mops, and vacuums for the flooring types in your space.
  • Trash Bags and Waste Liners: Make sure these are readily available to prevent overflow.

Eco-friendly cleaning products are a smart choice as they minimize environmental impact and reduce chemical exposure for staff.

3. Focus on High-Touch Areas

In any commercial space, certain surfaces are frequently touched, making them prime spots for germs and dirt buildup. Prioritize these areas by cleaning them frequently:

  • Door Handles and Light Switches: Disinfect daily to prevent the spread of germs.
  • Shared Office Equipment: Wipe down printers, computers, and phones.
  • Tables and Desks: Regularly sanitize these surfaces to keep them germ-free.

Routine attention to these high-traffic areas reduces the risk of illness and keeps the environment healthier for everyone.

4. Foster a “Clean As You Go” Culture

Encourage employees to keep their personal workspaces clean and to tidy up common areas as they use them. A few ways to support this approach:

  • Provide Supplies: Make it easy for staff to clean up by offering disinfectant wipes, paper towels, and hand sanitizers.
  • Strategic Waste Bins: Place trash and recycling bins in accessible locations.
  • Lead by Example: Supervisors can set the tone by maintaining tidy spaces themselves.

This approach keeps small messes from turning into larger cleaning issues and reinforces a sense of shared responsibility for workplace cleanliness.

5. Schedule Regular Deep Cleanings

Routine cleaning handles day-to-day upkeep, but deep cleaning is essential to maintain long-term hygiene and freshness. Consider scheduling deep cleans every few months or at least twice a year.

  • Focus Areas: Deep clean carpets, upholstery, and less accessible areas like air vents, light fixtures, and behind furniture.
  • Hire Professionals: For large or high-traffic spaces, hiring professional cleaners can ensure thorough and effective deep cleaning.

Deep cleaning keeps your workspace looking and smelling fresh, and it removes allergens and dust buildup for better air quality.

6. Improve Indoor Air Quality

Good air quality is essential for employee comfort and health. To ensure your workspace has fresh, clean air:

  • Maintain HVAC Systems: Regularly clean and replace HVAC filters to keep air flowing freely.
  • Invest in Air Purifiers: These devices reduce airborne allergens, dust, and pollutants.
  • Increase Ventilation: Open windows and doors when possible to let in fresh air.

Improving indoor air quality helps prevent respiratory issues, fatigue, and allergies, contributing to a more comfortable work environment.

7. Educate Employees on Hygiene Practices

Providing hygiene training for employees encourages them to maintain high standards of cleanliness. Here are some key topics to cover:

  • Hand Hygiene: Stress the importance of frequent hand washing.
  • Clean Shared Spaces: Encourage employees to wipe down shared desks and equipment.
  • Prompt Reporting of Spills: Remind everyone to report or clean up spills quickly to avoid slips or other hazards.

Visual cues like posters in break rooms or restrooms reinforce these practices and keep everyone mindful of workplace cleanliness.

8. Keep Restrooms Spotless

Restroom cleanliness impacts how employees and clients perceive your business. Consistent care in this area is a must for both hygiene and comfort.

  • Daily Cleaning: Sanitize all surfaces, including counters, sinks, toilets, and floors.
  • Stock Supplies: Keep soap, toilet paper, and paper towels replenished at all times.
  • Odor Control: Use air fresheners or odor-neutralizing products to keep restrooms smelling clean and fresh.

Keeping restrooms clean and well-supplied shows your commitment to maintaining a welcoming, professional environment.

9. Prioritize Safety in Cleaning Practices

Cleaning Strathfield requires safe practices to protect both the cleaning staff and other employees. Implement these safety measures:

  • Clear Signage: Use “wet floor” signs to prevent slips and falls in recently mopped areas.
  • Provide PPE: Equip cleaning staff with gloves, masks, and any other protective equipment necessary for handling chemicals.
  • Chemical Safety Training: Ensure that anyone handling commercial cleaning Bella Vista, chemicals knows how to use and store them safely.

Prioritizing safety not only protects your team but also helps avoid accidents and potential liabilities.

10. Regularly Review and Improve Your Cleaning Strategy

To keep your space consistently spotless, review your cleaning practices and make improvements as needed.

  • Seek Employee Feedback: Ask for input on areas that may need more frequent cleaning or adjustments in approach.
  • Monitor Product Effectiveness: Periodically review cleaning products and tools, replacing anything that isn’t delivering desired results.
  • Stay Updated on Best Practices: Keep an eye on new cleaning trends or techniques that could enhance efficiency and effectiveness.

Regular assessment allows you to fine-tune your strategy, adapting to the evolving needs of your commercial space and ensuring a consistently high level of cleanliness.

Final Thoughts

A clean commercial space does more than enhance aesthetics—it improves health, productivity, and overall workplace satisfaction. By implementing these ten essential tips, you can maintain a workspace that’s welcoming, safe, and professional. A structured cleaning routine, supported by the right supplies and practices, creates an environment where employees feel valued and clients feel welcomed. Investing in cleanliness is an investment in the success and reputation of your business.

Timber Flooring Options for Sydney Homes

Timber flooring Sydney is a popular choice for Sydney homeowners due to its warmth, natural beauty, and durability. With a variety of timber types to choose from, each offers distinct advantages that can make a big impact on the style and function of your home. Here’s a guide to help you choose the best timber flooring options for your home in Sydney.

1. Solid Hardwood Flooring

Why Choose It: Long-lasting, elegant, and truly timeless

Solid hardwood is a single piece of timber, making it one of the most durable and luxurious flooring options. Known for its rich, natural beauty, solid hardwood flooring includes popular Australian species like Blackbutt, Spotted Gum, and Jarrah, all renowned for their resilience and aesthetic appeal. These floors can be sanded and refinished multiple times, ensuring they stay looking beautiful for decades.

Considerations: Higher cost and sensitivity to moisture

While solid hardwood brings enduring beauty, it’s typically more expensive and may not be suitable for areas with high moisture, like bathrooms or basements. However, its durability makes it a worthwhile long-term investment for areas like living rooms and bedrooms.

2. Engineered Timber Flooring

Why Choose It: Stable, adaptable, and visually appealing

Engineered timber is crafted with a real timber surface bonded to a multi-layer core, providing the authentic look of hardwood while being more stable and resistant to temperature changes. This flooring is a great choice for Sydney’s climate, as it adapts well to fluctuating humidity and temperature. With a range of finishes and wood species available, engineered timber can match any interior style.

Considerations: Limited refinishing options

Engineered timber can be sanded and refinished only a few times, unlike solid hardwood. However, its layered construction makes it less prone to warping, making it suitable for high-traffic areas and multi-level homes.

3. Laminate Flooring

Why Choose It: Budget-friendly and easy to install

Laminate flooring is designed to mimic the look of real timber but at a more affordable price point. Composed of high-density fiberboard topped with a photographic layer, laminate comes in a wide array of designs and shades to suit any home style. Its tough surface makes it resistant to scratches, making it an ideal choice for homes with pets or kids.

Considerations: Non-refinishing and less natural feel

Although laminate is highly durable, it cannot be refinished once it’s worn down. While it doesn’t have the same tactile feel as real timber, it remains a popular choice for homeowners who want the timber look without the high cost.

4. Hybrid Flooring

Why Choose It: Waterproof, durable, and low-maintenance

Hybrid flooring combines the best of vinyl and laminate, offering the visual appeal of timber along with exceptional durability. It’s waterproof, making it an ideal option for kitchens, bathrooms, and laundry rooms. Hybrid floors are also resistant to scratching and denting, making them perfect for high-traffic areas in busy households.

Considerations: Less natural underfoot feel

Though hybrid flooring can resemble real timber, it may not feel quite as natural underfoot. Despite this, its durability and waterproof qualities make it a practical, stylish solution for many Sydney homes.

5. Parquetry Flooring

Why Choose It: Adds style, sophistication, and a unique look

Parquetry flooring involves arranging small pieces of timber in geometric patterns, such as herringbone or chevron, creating a distinctive, classic look. It’s a great option for homeowners who want to add character and sophistication to their interiors. Parquetry is a perfect choice for feature rooms like living rooms or foyers, where it can make a statement.

Considerations: Higher cost and skilled installation required

Parquetry can be a more expensive and intricate option, often requiring professional installation to achieve a seamless design. It’s best suited to areas where it can be showcased, rather than high-traffic zones where its pattern may wear down over time.

Finding the Best Timber Flooring for Your Sydney Home

Choosing the right floating timber floors depends on your home’s design, the room’s function, and your budget. Solid hardwood is ideal for those seeking longevity and elegance, while engineered timber and hybrid options offer a mix of style and practicality. Laminate is perfect for those on a budget, and parquetry brings a unique, artistic element to more formal spaces.

By selecting the right type of timber flooring for each space, you can enhance both the value and aesthetic appeal of your Sydney home, creating a warm, inviting environment tailored to your lifestyle. Try out Hana Timber if you are looking for best timber floor in Sydney.

A Comprehensive Guide to House Painting Costs

1. Project Scope and Size: Defining Your Painting Needs

The scale of your painting project is the biggest influence on cost. Whether you’re painting the interior, exterior, or both, factors like square footage, ceiling height, and surface texture all impact how much paint, time, and labor will be needed. Here’s how to break down the costs.

Interior vs. Exterior Costs

Interior painting is often less expensive per square foot than exterior painting, which typically requires more extensive prep work, specialized equipment, and weather-resistant materials. Tall ceilings, large windows, and architectural details can further influence labor and material needs, impacting your final cost.

Estimating Square Footage and Scope

Professional painters often calculate estimates based on square footage, as this approach gives an accurate measure of the paint and labor needed. High ceilings, textured walls, and ornate trim work may require more time, adding to the project’s cost. Make sure your contractor considers any unique features of your space to give you a clear picture of expenses.

2. Paint Quality: Choosing the Best Option

The quality of the paint you select significantly impacts the overall cost and results. Higher-end paints might be more expensive upfront, but they provide better coverage, are more durable, and may extend the time before you need a repaint.

Paint Types and Price Points

  • Acrylic Paint: Known for its durability, acrylic paint is great for humid areas like bathrooms and kitchens. It’s slightly pricier than latex, but its longevity can make it a cost-effective choice.
  • Latex Paint: A popular and budget-friendly option, latex paint dries quickly and is available in multiple finishes, making it suitable for many areas in the home.
  • Oil-Based Paint: Often used on doors and trim, oil-based paints provide a smooth finish but are typically more expensive and require longer drying times.
  • Eco-Friendly Paints: Low or zero-VOC (volatile organic compound) paints are a healthier, environmentally friendly choice. They’re generally a bit more expensive but are ideal for indoor areas where air quality is a concern.

Finish Matters

Paint finishes range from matte to high gloss, each serving a different purpose. Glossy finishes, while more expensive, work well in areas that need frequent cleaning, like kitchens, while matte finishes can be more cost-effective in lower-traffic spaces. Discussing your needs with a professional can help you choose finishes that balance cost and function.

3. Labor Costs: Professional vs. DIY

Labor is a substantial part of painting costs, often accounting for up to 80% of the total project expense. While a DIY approach might save you money, professional painters bring expertise, efficiency, and often a more polished finish that can be worth the investment.

Hourly Rates and Project Complexity

Painters may charge by the hour or per square foot, with rates generally ranging from $20 to $70 per hour. More complex projects, like custom finishes, decorative techniques, or working in tight spaces, often cost more due to the additional time and skill required. Asking for a detailed breakdown of hourly rates and project estimates can help you make an informed decision.

Special Techniques and Customization

Accent walls, faux finishes, and other custom details can add visual appeal to a space but require specialized skill, which can increase costs. If you’re considering a unique finish, ask your contractor to include these details in their estimate so you know what to expect.

4. Preparation and Added Services: What to Expect

A successful paint job requires more than just paint. Preparing the surface is crucial for achieving a smooth, long-lasting finish. This might involve cleaning, patching, priming, and even some repairs before the paint is applied.

Surface Prep and Repair Needs

Proper prep work varies based on the condition of your walls. Damaged or rough surfaces need repairs, while glossy or dark-colored walls often require a primer to ensure the new paint adheres well and the color shows accurately. Although this preparation adds to the cost, it’s a necessary step for professional-quality results.

Additional Services: Protecting Your Space

Some Korean painters offer extra services, such as furniture moving, taping, and covering floors. These added tasks can protect your belongings and save you hassle, but they may come with additional fees. It’s helpful to ask your painter about these services upfront to avoid unexpected costs.

5. Total Project Cost: Bringing It All Together

Estimating the cost of a painting project depends on many factors, from the size of the space to the type of paint, labour, and prep work required. Here’s a rough breakdown:

  • Labour: Typically ranges from $500 to $3,000, depending on the complexity and duration of the job.
  • Paint and Supplies: Expect to spend between $200 and $1,200 based on the type and quality of paint.
  • Preparation and Repairs: This can add $150 to $1,000 to the overall cost, depending on the extent of work needed.
  • Additional Services: Covering furniture, taping, or priming could cost an extra $50 to $300.

These ranges are averages and may fluctuate based on regional rates and the scope of your project. Gathering multiple estimates can help you better understand the costs specific to your area and home.

Maximizing Your Investment: Tips for a Successful Project

To get the most value from your painting project, here are some practical tips:

  • Request Several Quotes: Collecting multiple quotes allows you to compare prices and services. Ask each contractor for a detailed breakdown so you can understand what’s included.
  • Choose Paint Wisely: Consider using mid-range paint for low-traffic rooms and reserve higher-end options for spaces like kitchens and bathrooms where durability matters most.
  • Plan for Off-Season Savings: Many house painters offer discounts during their slower months (often winter). Taking advantage of these deals could help you save significantly.
  • Save Extra Paint for Touch-Ups: If you have any leftover paint, keep it for future touch-ups to maintain the color and avoid mismatched shades.

Dry Eye Syndrome: 10 Expert Tips for Soothing Relief and Prevention

Dry eye syndrome (DES) is a common and sometimes chronic condition where your eyes do not produce enough tears, or the tears evaporate too quickly. Factors contributing to dry eyes can range from extended screen use to environmental dryness, medications, and even aging. If left unchecked, dry eye symptoms like itchiness, redness, and blurred vision can significantly impact daily life. Here’s a comprehensive look at managing and preventing dry eye syndrome with practical, in-depth strategies.

1. Identify and Address Environmental Triggers

Your environment plays a major role in dry eye symptoms, and even small changes can make a big difference:

  • Humidify Your Space: Using a humidifier, especially in dry seasons or air-conditioned rooms, can add essential moisture to the air and help prevent tear evaporation. Aim for indoor humidity levels between 30–50% for optimal eye comfort.
  • Control Airflow: Direct airflow from heaters, fans, or car vents can exacerbate dryness. Adjust vents to avoid direct airflow on your face and use protective eyewear like wraparound glasses if you’re exposed to strong winds or dry air outdoors.

2. Follow the 20-20-20 Rule for Screen Use

One of the most common causes of dry eye is prolonged screen use. The 20-20-20 rule is a proven strategy for reducing strain:

  • Take Frequent Breaks: Every 20 minutes, shift your gaze from the screen to an object about 20 feet away and focus for at least 20 seconds. This practice helps reset your eyes, encourages regular blinking, and can reduce eye strain significantly.
  • Practice Blinking Exercises: Blinking spreads a fresh layer of moisture over your eyes. Try deliberately blinking a few times every few minutes, especially during screen-heavy work, to help keep your eyes lubricated.

3. Warm Compresses and Eyelid Hygiene

Meibomian gland dysfunction (MGD), which involves clogged oil glands in the eyelids, is a common cause of DES. Warm compresses can help by stimulating these glands:

  • Apply a Warm Compress: Soak a clean washcloth in warm water, then place it over your closed eyes for 5–10 minutes. This softens the oils in the eyelids, helping them flow more easily and maintaining a healthy tear film.
  • Eyelid Massage and Cleansing: After applying a warm compress, gently massage your eyelids to further release oils from the glands. Use a gentle eyelid cleanser to wash away debris and bacteria, which can contribute to inflammation and discomfort.

4. Hydrate Consistently

Adequate hydration is crucial for tear production. Here are some tips for staying well-hydrated to support eye health:

  • Drink Enough Water: Aim for about 8 glasses of water a day, and adjust as needed based on factors like climate and physical activity.
  • Limit Dehydrating Beverages: Beverages high in caffeine and alcohol can have a diuretic effect, potentially reducing moisture in your eyes. Try to balance these with additional water intake.

5. Prioritize Omega-3 Fatty Acids in Your Diet

Omega-3 fatty acids, known for their anti-inflammatory properties, may improve tear quality and reduce symptoms of dry eyes. Consider adding these omega-3-rich foods to your meals:

  • Fatty Fish: Salmon, sardines, and mackerel are excellent sources of omega-3s and can easily be incorporated into a balanced diet.
  • Nuts and Seeds: Flaxseeds, chia seeds, and walnuts are great plant-based sources of omega-3s and offer additional health benefits.
  • Supplements: If getting enough omega-3s through diet is challenging, talk to your doctor about a high-quality fish oil or flaxseed oil supplement.

6. Use Artificial Tears Strategically

Over-the-counter artificial tears can provide relief for mild dry eyes, but using them effectively can maximize their benefits:

  • Choose the Right Formula: Preservative-free artificial tears are recommended for frequent use as they’re gentler on the eyes.
  • Follow a Consistent Schedule: Using artificial tears throughout the day, not just when symptoms peak, can help maintain lubrication. For moderate symptoms, try applying drops every few hours as part of your daily routine.

7. Adopt an Eye-Friendly Diet

The food you eat can have a big impact on eye health. Antioxidant-rich fruits and vegetables, as well as foods high in vitamins A, C, and E, support healthy eyes and tear production:

  • Vitamin A: Leafy greens, carrots, and sweet potatoes are packed with vitamin A, essential for eye health.
  • Vitamin C: Bell peppers, citrus fruits, and strawberries are rich in vitamin C, which can help protect the eyes from oxidative stress.
  • Vitamin E: Nuts, seeds, and spinach contain vitamin E, which has protective properties against free radicals.

8. Avoid Makeup Around the Eyes

Some eye makeup can exacerbate dry eye symptoms, especially if it clogs the oil glands in the eyelids. Here are some tips to avoid makeup-related irritation:

  • Choose Eye-Friendly Products: Opt for hypoallergenic, oil-free makeup products designed for sensitive eyes.
  • Cleanse Thoroughly: Make sure to remove all makeup before bed, focusing especially on mascara and eyeliner, which can clog oil glands.

9. Limit Exposure to Smoke and Pollutants

Pollutants and smoke are well-known irritants and can worsen dry eye symptoms. Here’s how to protect your eyes from these elements:

  • Avoid Smoking and Secondhand Smoke: Cigarette smoke irritates the eyes and can dry out the tear film. If you smoke, quitting can make a significant difference in eye health and overall wellness.
  • Use Protective Eyewear: If you work or spend time in dusty or polluted areas, wear safety goggles or glasses to shield your eyes from irritants.

10. Get Enough Restful Sleep

Adequate rest is essential for healthy eyes, as sleep allows the eyes to replenish moisture and repair themselves. Try these tips for better sleep hygiene:

  • Follow a Consistent Sleep Schedule: Aim for 7–9 hours of sleep each night. Regular rest can significantly reduce dry eye symptoms.
  • Create a Sleep-Conducive Environment: Use blackout curtains, avoid screens an hour before bed, and keep the room comfortably cool.

When to See a Specialist

While the tips above can help manage mild to moderate dry eye symptoms, some cases may require medical intervention:

  • Chronic Symptoms: If your symptoms persist despite trying multiple remedies, consult an eye specialist to explore advanced treatments like prescription medications, punctual plugs, or light therapy.
  • Severe Discomfort: Sudden and severe symptoms, especially if accompanied by vision changes, should be evaluated promptly by an eye care professional.

Final Thoughts: Dry Eye Management is Ongoing

Dry eye management is all about maintaining consistency and finding the right combination of strategies that work for you. Natural remedies like a balanced diet, hydration, and environmental control can often provide relief, but advanced treatments are available when needed. With a proactive approach and regular care, it’s possible to keep dry eye symptoms manageable, leading to healthier and more comfortable eyes. If need keratoconus fitting, or need a Dry Eye Clinic in Sydney try out Boda Eye Care in Auburn, Sydney.

The Benefits of Thai Massage

Thai massage, commonly known as “yoga massage,” is a unique healing practice that combines elements of acupressure, deep stretching, and yoga. Unlike traditional massages, Thai massage is performed on a mat and involves both the therapist and the recipient in an active, dynamic process. Here are some of the key benefits of Thai massage:

1. Boosts Flexibility and Mobility

Thai massage Parramatta incorporates a series of stretches that help loosen tight muscles and improve joint mobility. This is particularly beneficial for those looking to enhance their athletic performance, recover from injuries, or simply increase their overall flexibility.

2. Alleviates Muscle Tension and Pain

The deep pressure techniques used in Thai massage effectively relieve muscle tension and chronic pain. This therapy is ideal for individuals dealing with soreness, stiffness, or tension-related headaches, providing significant relief and relaxation.

3. Enhances Blood Circulation

By applying rhythmic pressure and stretching, Thai massage promotes better blood flow throughout the body. Improved circulation enhances oxygen and nutrient delivery to tissues, which aids in recovery, reduces fatigue, and promotes overall health.

4. Reduces Stress and Promotes Relaxation

Thai massage’s gentle yet firm movements create a deeply relaxing experience. This calming effect on the nervous system helps to reduce stress, anxiety, and mental fatigue, leaving you feeling more centered and peaceful.

5. Increases Energy Levels

Through the activation of energy pathways, known as “Sen,” Thai massage helps release blockages and restore the flow of energy in the body. This revitalization can result in heightened energy and a sense of refreshment after the session.

6. Improves Posture

Thai massage helps relieve tension in the back, neck, and shoulders, which can lead to better posture. By realigning the body and relaxing tight muscles, it encourages a more natural and comfortable stance.

7. Supports Emotional Well-being

Thai massage in Strathfield offers emotional benefits as well. The holistic nature of the practice can help clear mental clutter, reduce emotional stress, and promote a sense of balance and well-being.

8. Promotes Better Sleep

The deep relaxation achieved during a Thai massage can significantly enhance sleep quality. By calming the mind and easing muscle tension, it helps you fall asleep more easily and enjoy a restful night.

9. Relieves Headaches

For individuals prone to tension headaches or migraines, Thai massage can provide relief by relaxing tight muscles in the head, neck, and shoulders. This reduction in tension can help alleviate headache symptoms and prevent future occurrences.

10. Holistic Approach to Wellness

Thai massage addresses the body as a whole, promoting not just physical healing but also mental and emotional wellness. This comprehensive approach fosters a greater sense of balance and harmony in your overall well-being.

Conclusion

Thai massage is a powerful practice that offers a wide range of benefits, from improving flexibility and alleviating pain to reducing stress and boosting energy. By engaging both the body and mind, Thai massage provides a holistic experience that can enhance your overall health and well-being. Whether you’re looking for relaxation or recovery, Thai massage can leave you feeling rejuvenated and revitalized.

Top Korean Cosmetic Tips for Glowing, Flawless Skin

Korean beauty trends, often referred to as “K-beauty,” have taken the world by storm, with their focus on healthy, glowing skin. Korean women are known for their radiant complexions and innovative skincare routines. If you’re looking to achieve the same flawless look, here are some top Korean cosmetic tips to incorporate into your beauty regimen:

1. Double Cleansing

The cornerstone of K-beauty is the double cleanse. The first step involves using an oil-based cleanser to remove makeup, sunscreen, and excess oil. Oil cleansers effectively break down impurities without stripping the skin. Follow this with a water-based cleanser to clear away sweat, dirt, and any remaining residue. This two-step method ensures that your skin is thoroughly clean, allowing for better absorption of skincare products.

2. Hydrate with Toners

Toners in Korean skincare are not astringent or drying like some Western counterparts. Instead, they focus on hydrating and prepping the skin for the next steps. Korean Cosmetic Australia toners balance the skin’s pH and add a layer of moisture, allowing serums and creams to penetrate more effectively. Look for toners rich in natural ingredients like green tea, chamomile, or rose water for extra nourishment.

3. The 7-Skin Method

If you have dry skin, the 7-skin method is your friend. It involves layering toner up to seven times to deeply hydrate the skin. Apply a small amount of toner, pat it in until absorbed, and repeat the process. This technique locks in moisture and gives your skin a plumped-up, radiant finish.

4. Essence for Glowing Skin

Korean skincare like doterra oils or atomy skincare places a heavy emphasis on hydration, and essences are essential for this. An essence is a lightweight, concentrated formula that delivers moisture and active ingredients deep into the skin. Apply it after toner but before serums for maximum hydration and a dewy glow. Look for essences that contain ingredients like hyaluronic acid, niacinamide, or snail mucin for added benefits.

5. Layer Serums for Targeted Solutions

In K-beauty, it’s common to layer serums, each addressing a different skin concern. If you’re looking to brighten, hydrate, and prevent aging, for example, you can use a brightening serum with vitamin C, followed by a hydrating one with hyaluronic acid. By targeting specific issues, you can achieve more effective results.

6. Sheet Masks for Instant Hydration

Korean women swear by sheet masks for a quick skin pick-me-up. These single-use masks are drenched in serum and provide an instant boost of hydration and nutrients. Use sheet masks two to three times a week, or whenever your skin feels dull or dry. They’re perfect before an event or when your skin needs an extra glow.

7. Sun Protection Every Day

Korean beauty heavily emphasizes sun protection. Even on cloudy days or when indoors, UV rays can cause premature aging and damage. Use a broad-spectrum SPF 30 or higher daily, and reapply throughout the day. Look for lightweight, non-greasy formulas that won’t clog pores, ensuring sun protection remains comfortable.

8. Natural-Looking Makeup

Korean cosmetic trends prioritise a natural, radiant look. Rather than heavy foundations, opt for BB creams or cushion compacts that provide a light, buildable coverage while still allowing your skin to breathe. Finish off with a touch of blush, a soft lip tint, and lightly filled-in brows for a fresh, youthful appearance.

9. Lip Care

Lip care is just as important in Korean beauty as skincare. Exfoliate your lips regularly using a gentle lip scrub and follow up with a hydrating lip balm. Korean lip products often have a soft, glossy finish, enhancing the natural color of your lips. Tinted balms or sheer glosses are popular for achieving a natural yet polished look.

10. Facial Massage for Lymphatic Drainage

Incorporating facial massages into your routine can improve blood circulation, reduce puffiness, and give you a firmer, more lifted appearance. Many Korean women use jade rollers, gua sha tools, or simply their fingers to massage their faces in upward motions. This simple step helps the skin look refreshed and promotes a youthful glow.

Conclusion

Korean cosmetic tips are all about achieving radiant, healthy skin through a combination of skincare and makeup. By focusing on hydration, sun protection, and gentle layering of products, you can create a beauty routine that enhances your natural beauty. Whether you’re a K-beauty beginner or an enthusiast, these tips will help you achieve that coveted glowing complexion.

Benefits of Having Fly Screens in the Home

Living in Australia offers a unique blend of stunning natural landscapes, beautiful weather, and an outdoor lifestyle that many around the world envy. But with all the beauty comes one of the less glamorous aspects of Aussie life—bugs. From the classic summer mozzies (mosquitoes) to flies, moths, and the occasional creepy crawly, the Australian climate and environment create the perfect breeding grounds for insects. While it’s impossible to avoid them entirely, one highly effective way to keep these uninvited guests at bay is by installing pleated fly screens in your home.

Fly screens have become a staple in many Australian households, offering a variety of benefits beyond just keeping pests out. Whether you’re building a new home or considering retrofitting your windows and doors with screens, let’s dive into the benefits of fly screens and why they are a must-have in any Australian home.

1. Keep Pesky Insects Out

Let’s start with the obvious reason why most Australians opt for fly screens—the ability to keep unwanted insects outside where they belong. Flies, mosquitoes, and other pests can make indoor living unbearable, especially during the summer months. Mosquitoes, in particular, are not only irritating but can also carry diseases like Ross River virus and dengue fever in some parts of the country.

Retractable Fly screens act as a barrier, allowing fresh air to flow into your home while keeping those annoying bugs out. You can leave your windows and doors open, enjoying the breeze without worrying about pests buzzing around or contaminating your food. For homes in bushy or tropical areas, where insect populations can be even more prevalent, fly screens are an absolute lifesaver.

2. Improve Indoor Airflow and Ventilation

One of the great joys of living in Australia is being able to open up your home and enjoy the fresh air. However, without fly screens, you may find yourself keeping windows closed to avoid insects. By installing screens, you allow for increased airflow and better ventilation throughout your home without compromising comfort.

Good ventilation is vital for maintaining a healthy indoor environment. It helps to regulate temperature, reduce humidity, and prevent the buildup of indoor pollutants. Fly screens allow you to keep windows and doors open without worrying about pests entering, creating a comfortable and breathable living space.

3. Enhance Security

Modern fly screens, especially those made with tougher materials like stainless steel mesh, can double as a security measure for your home. These screens are built to be durable and can withstand a fair amount of pressure, deterring potential intruders while still allowing for fresh air to circulate.

Security screens are designed with tamper-proof locks, which make it more difficult for someone to break into your home through a window or door. They also serve as a visual deterrent—if a would-be burglar sees that your windows and doors are protected by robust security screens, they’re more likely to move on to an easier target.

4. Reduce Energy Costs

Australia’s climate can range from sweltering summer days to cool winter evenings, meaning most households are often reliant on air conditioning and heating. However, with energy prices on the rise, many Australians are looking for ways to reduce their energy consumption.

Fly screens can help regulate the temperature inside your home by allowing you to keep windows and doors open without letting insects in. This natural ventilation can reduce the need for air conditioning, especially during cooler evenings when a breeze can cool your home down more effectively than artificial cooling systems.

During warmer months, by allowing cooler air to flow in, you can rely less on air conditioning, ultimately reducing your energy bills. Over time, this can result in significant savings while also benefiting the environment by lowering your household’s carbon footprint.

5. Protect Against Harmful UV Rays

Most modern fly screens, especially those designed for Australian homes, come with the added benefit of providing some protection against harmful UV rays. Harsh sunlight can cause furniture, carpets, and other household items to fade over time. UV-blocking fly screens help reduce the amount of direct sunlight entering your home, which can protect your belongings and preserve their appearance.

Additionally, these screens can help to reduce the overall glare inside your home, making it more comfortable to sit near windows or doors without being overwhelmed by intense sunlight. This added UV protection is particularly beneficial for homes in sunnier parts of Australia, where the sun’s rays can be strong throughout much of the year.

6. Increase Privacy Without Sacrificing Views

Fly screens, especially those with a fine mesh design, can provide an additional layer of privacy for your home. Depending on the material and style, they can obscure the view into your home from the outside while still allowing you to see out. This can be especially useful for homes located in busy areas or close to neighbors.

At the same time, fly screens allow you to enjoy the view from inside your home, particularly if you have large windows or doors facing beautiful outdoor areas like gardens, parks, or even coastal views. Unlike curtains or blinds, which block out the view entirely, fly screens strike the perfect balance between privacy and visibility.

7. Keep Pets Safe Inside

If you’re a pet owner, you know how much your furry friends love to roam. Fly screens offer the dual benefit of allowing you to leave doors and windows roller blinds open while preventing pets from wandering outside unsupervised. This is particularly useful for households with cats or small dogs, as it provides peace of mind that your pets won’t sneak out when you’re not looking.

Additionally, fly screens help prevent birds, snakes, and other animals from wandering into your home. Australia’s wildlife is as diverse as it is abundant, and while we may love observing it in nature, having an unexpected critter enter your living space is a different story. A sturdy fly screen can be the perfect safeguard.

8. Boost the Value of Your Home

Installing fly screens is an investment that can increase the overall value of your property. Homebuyers are often looking for homes that offer practical features, and fly screens are seen as a valuable addition. They not only enhance the comfort of the home but also provide protection, security, and energy-saving benefits—all factors that make a home more attractive to potential buyers.

If you’re considering selling your home in the future, having high-quality fly screens already installed can be a selling point that sets your property apart from others on the market. It’s a relatively small investment that can pay off in terms of both comfort and resale value.

9. Easy to Maintain and Clean

Unlike some home installations that require constant upkeep, fly screens are generally low-maintenance and easy to clean. Most screens can be wiped down with a damp cloth or hosed down with water to remove dust and debris. Regular cleaning can help extend the life of your fly screens, keeping them looking fresh and functioning properly for years to come.

For households that experience a high level of insect activity or live in areas prone to dust and dirt, investing in high-quality fly screens made from durable materials will ensure that they can withstand the elements and remain effective over time.

Conclusion

In the Australian lifestyle, where outdoor living is as much a part of daily life as indoor comfort, fly screens are more than just a practical addition to the home—they’re a necessity. From keeping pests at bay to enhancing your home’s security, improving ventilation, and reducing energy costs, the benefits of fly screens go far beyond their initial function. They allow you to enjoy the fresh air and beautiful views without the hassle of dealing with insects or other intruders, all while boosting your home’s value and providing peace of mind.

Whether you’re building a new home or looking for ways to improve your existing living space, investing in fly screens is a decision that will pay off in comfort, convenience, and long-term savings. After all, in a country where the outdoors is such an integral part of life, having the freedom to enjoy it from the comfort of your home—without the pests—is priceless.

The Ultimate Guide to Glass Repair for Melbourne

Glass plays a vital role in the beauty and functionality of modern properties, whether residential or commercial. However, glass can be vulnerable to damage from weather, accidents, or daily wear and tear. When glass breaks or cracks, knowing how to manage repairs is essential for safety, security, and maintaining aesthetics. In this guide, we’ll explore practical tips for quick glass repairs, safety precautions, and why professional glass repair services are crucial for homes and businesses in Melbourne.

Common Glass Problems in Melbourne

Melbourne’s weather can be unpredictable, with hot summers and cool winters putting a strain on glass surfaces in homes and commercial properties alike. Common causes of glass damage include:

  • Cracks and Chips: These can occur due to minor impacts, temperature changes, or even structural shifts. If not addressed, they may worsen over time.
  • Shattered Glass: This usually results from high-impact accidents, extreme weather conditions, or vandalism.
  • Scratches: Over time, glass surfaces, especially in commercial settings, can become scratched from frequent use, reducing their clarity and visual appeal.

Let’s dive into both short-term and long-term solutions for glass repairs in residential and commercial settings.

Temporary Glass Repair Solutions for Homes

Quick Fixes for Homeowners

If a window or door in your home cracks or breaks, taking swift action can prevent further damage and ensure safety. Here are some quick, temporary fixes:

  1. Clear Tape for Cracks: If you spot a small crack or chip, apply clear packing tape over the area to hold the glass in place. This prevents the crack from spreading until you can arrange for a professional repair.
  2. Nail Polish for Chips: Clear nail polish can be used to fill small chips temporarily. Apply multiple layers, allowing each to dry before applying the next. This helps seal the chip and prevents it from deepening.
  3. Plastic Sheeting for Larger Breaks: For larger cracks or breaks, secure the area with heavy-duty plastic sheeting and tape to keep out rain, dust, and wind. This provides short-term protection from the elements.
  4. Boarding Up Shattered Glass: If a window shatters, boarding it up with plywood is the safest solution. Be sure to tape the edges to avoid sharp glass cutting anyone. This method ensures your home is safe from outside elements and intruders.

While these solutions are effective for temporary fixes, they don’t replace the need for professional glass repair.

Long-Term Solutions for Homeowners

While temporary fixes can hold off further damage, professional glass repairs ensure the safety, security, and insulation of your home. Professional glaziers can properly assess the damage, repair or replace the glass, and ensure that your home remains secure and energy-efficient.

Temporary Glass Repair Solutions for Businesses

Quick Fixes for Commercial Properties

Glass damage in a business setting can disrupt daily operations, pose safety hazards, and affect the building’s appearance. For businesses, quick fixes are essential until professional repairs can be arranged. Here are some temporary solutions:

  1. Plastic Sheeting for Cracks: For a cracked shopfront window or office glass partition, apply heavy-duty plastic sheeting over the crack to protect it from worsening. This will temporarily maintain the structural integrity of the glass.
  2. Boarding Up Shattered Windows: If your shopfront window or glass door shatters, immediately board up the area with plywood to protect your business from theft or additional damage. Make sure to secure the boards tightly to avoid accidents.
  3. Temporary Window Film: Applying window film over cracks can help strengthen the glass temporarily and prevent further damage until a full repair or replacement is possible.

Emergency Glass Repair Services for Businesses

Many Melbourne glass repair companies offer emergency services, including temporary boarding up or protective films for commercial properties. This is a crucial step for ensuring the safety and security of your business while awaiting full repairs.

Safety Tips for Handling Broken Glass

Handling broken glass, whether at home or in a business, can be dangerous. To avoid injury, follow these important safety precautions:

  1. Wear Protective Gear: Always wear heavy-duty gloves, long sleeves, and safety goggles when dealing with broken glass. This will protect your hands, arms, and eyes from potential injuries.
  2. Careful Cleanup: Use pliers or another tool to remove larger pieces of broken glass. Sweep smaller shards into a dustpan, and vacuum the area thoroughly to ensure no tiny pieces are left behind.
  3. Keep Children and Pets Away: Broken glass can pose a serious threat to children and pets. Make sure to block off the area until all debris has been cleared.
  4. Professional Assistance: If you’re unsure how to handle the damage or if the glass breakage is severe, it’s always best to call a professional glazier. They will have the tools and expertise to manage the situation safely.

The Importance of Professional Glass Repair

While temporary fixes can help manage the situation, professional repairs are essential to ensure long-term safety, durability, and functionality. Here’s why relying on expert glass repair services is a must:

  1. Prevent Further Damage: A small crack can grow if not treated correctly. Professional repairs will stop the damage from worsening and ensure that your windows and glass doors remain secure.
  2. Energy Efficiency: Damaged windows can lead to poor insulation, resulting in higher energy bills, especially during Melbourne’s hot summers and cold winters. Professional repairs will restore your property’s energy efficiency.
  3. Security: Broken windows or glass doors can pose security risks for both homes and businesses. By hiring a professional glass repair service, you can ensure that your property is protected from intruders and outside elements.
  4. Expertise and Equipment: Glass repair requires the right tools and knowledge. Professionals will ensure that your glass is repaired or replaced according to industry standards, preventing any future issues.
  5. Building Code Compliance: Especially for commercial properties, glass repairs must meet local building regulations. Hiring a licensed professional ensures that all repairs comply with Melbourne’s safety codes and standards.

Choosing the Right Glass Repair Service in Melbourne

When looking for a reliable glass repair company in Melbourne, keep the following in mind:

  • 24/7 Emergency Services: Glass damage doesn’t always happen during regular business hours. Choose a company that offers emergency services to ensure quick repairs when you need them most.
  • Experience and Expertise: Look for a service provider with experience in both residential and commercial glass repairs, as they’ll be able to handle a wide range of issues.
  • Quick Turnaround: Time is of the essence when it comes to glass repairs. Opt for a company with a reputation for fast, efficient service.
  • Licensed and Insured: Ensure the company is fully licensed and insured for your peace of mind.

Conclusion

Whether you’re dealing with a cracked window at home or a shattered shopfront in your business, taking quick action is crucial to maintaining safety, security, and energy efficiency. Temporary solutions like clear tape, plastic sheeting, or boarding up windows can help in the short term, but professional repairs are essential for long-lasting results.

With the right glass repair service in Melbourne, you can rest assured that your property is secure, energy-efficient, and safe from further damage. Taking care of glass issues promptly will not only save you money in the long run but also ensure the safety and aesthetics of your home or business for years to come.

What to Consider When Getting Ceramic Coating for Your Car

Ceramic coating has become increasingly popular among car owners for its ability to protect paint and enhance appearance. However, before committing to this investment, it’s essential to consider several key factors. Here’s a guide to help you make the best decision.

1. What is Ceramic Coating?

Ceramic coating Sydney is a liquid polymer applied to a vehicle’s exterior, creating a strong protective layer that bonds with the paint. This coating provides various benefits, such as a glossy finish, scratch resistance, UV protection, and hydrophobic properties that help repel water and dirt.

2. Understanding the Cost

The cost of ceramic coating can vary widely based on the product, vehicle size, and whether you choose professional application or a DIY approach. Factor in both the initial cost and potential future maintenance or reapplication expenses. While the upfront investment may be significant, the long-term benefits can make it worthwhile.

3. Professional vs. DIY Application

Consider whether you want to apply the ceramic coating yourself or hire a professional. Professional application often leads to better results due to expertise and access to high-quality materials. However, DIY kits are available for those willing to put in the time and effort. Research both options to determine which suits your preferences.

4. Selecting the Right Product

Not all ceramic coatings are created equal. When choosing a product, consider the following:

  • Durability: Look for coatings that last 2-5 years or longer.
  • Hydrophobic Properties: A quality coating should effectively repel water and dirt.
  • UV Protection: Ensure the coating protects against UV rays to prevent paint fading.
  • Brand Reputation: Opt for established brands known for their quality and reliability.

5. Vehicle Preparation

Proper preparation is crucial for effective ceramic coating application. The vehicle must be thoroughly cleaned, and any imperfections, like scratches or swirl marks, should be addressed. Consider paint correction services before applying the coating or ceramic tint Sydney to achieve optimal results.

6. Maintenance Needs

While ceramic coatings offer excellent protection, they aren’t completely maintenance-free. Familiarize yourself with maintenance requirements, such as regular washing with pH-neutral soap and periodic inspections to ensure the coating remains effective. Some coatings may need additional top-ups to maintain their protective qualities.

7. Application Environment

The environment in which the ceramic coating is applied can impact the outcome. Ideally, application should occur in a controlled, dust-free setting, away from direct sunlight and extreme temperatures. If applying it yourself, choose a suitable location.

8. Understanding Limitations

While ceramic coatings provide many advantages, they have limitations. They do not render your car completely resistant to damage; deep scratches and heavy impacts can still affect the paint. Additionally, ceramic coatings won’t prevent stone chips or other physical damage.

9. Warranty and Guarantee

Check if the ceramic coating comes with a warranty or guarantee. Many professional applicators offer warranties covering defects in the product or application. Be sure to understand the terms to know what is included.

10. Consult with Professionals

If you’re uncertain about any aspect of ceramic coating, consult with professionals. They can offer valuable insights and recommendations tailored to your vehicle’s specific needs and your driving habits.

Conclusion

Investing in ceramic coating can significantly enhance and protect your vehicle’s appearance. By considering these factors, you can make an informed decision that meets your needs and keeps your car looking great for years to come. Whether you opt for a professional service or a DIY approach, the right preparation and maintenance will ensure a successful ceramic coating experience.

A Comprehensive Guide to Painting a Moulded Bathroom Wall

Painting a moulded bathroom wall is a fantastic way to enhance the look and feel of your space. Not only does it allow you to update the décor, but it can also help protect against moisture and mould. In this comprehensive guide, we’ll walk you through the essential steps to successfully paint your moulded bathroom walls, ensuring a professional-looking finish that lasts.

Why Paint Your Bathroom Walls?

Before diving into the process, let’s discuss why painting your bathroom walls is beneficial:

  1. Aesthetic Appeal: A fresh coat of paint can dramatically change the atmosphere of your bathroom. Whether you want a serene, spa-like vibe or a vibrant, energetic look, the right color can set the tone.
  2. Protection Against Moisture: Bathrooms are prone to high humidity levels, which can lead to mould growth and damage. Painting with moisture-resistant paints helps protect your walls and maintain a healthy environment.
  3. Cost-Effective Update: Painting is one of the most cost-effective ways to update your home. It’s significantly less expensive than renovations or replacing fixtures while providing a significant visual impact.
  4. Customization: Painting allows you to express your personal style and customize your space to fit your preferences.

Step-by-Step Guide to Painting a Moulded Bathroom Wall

Step 1: Assess the Extent of Mould

Before you start painting, it’s crucial to assess the extent of any mould present on your walls. Mould can appear as black, green, or white spots and often has a musty smell. If you discover a small patch, you might be able to handle it yourself, but if the mould is widespread, consider hiring a professional.

  • Identify Causes: Determine the cause of mould growth, such as poor ventilation, leaks, or high humidity. Addressing the root cause is essential to prevent recurrence.
  • Safety First: When dealing with mould, wear protective gear, including gloves and a mask, to avoid inhaling spores. Ensure good ventilation in the area while you work.

Step 2: Clean the Wall Thoroughly

Cleaning is vital to preparing your moulded bathroom wall for painting. This step ensures that all mould, dirt, and grime are removed, allowing for better paint adhesion.

  • Mixing a Cleaning Solution: Create a cleaning solution using water and bleach (1 part bleach to 3 parts water). Alternatively, you can use a commercial mould remover.
  • Scrubbing the Surface: Using a sponge or scrub brush, scrub the affected areas vigorously. Allow the solution to sit for 10-15 minutes to kill any remaining mould spores.
  • Rinsing and Drying: Rinse the wall thoroughly with clean water to remove any bleach residue. Dry the wall completely with a clean towel or allow it to air dry. This step is crucial, as painting over a damp surface can trap moisture and lead to further mould growth.

Step 3: Apply Anti-Mould Treatment

To prevent mould from returning, it’s important to apply an anti-mould treatment or primer before painting.

  • Choosing the Right Product: Look for a mould-resistant primer or solution designed specifically for bathrooms. These products often contain fungicides that inhibit mould growth.
  • Application: Use a paintbrush or roller to apply the primer evenly over the cleaned and dried surface. Pay extra attention to the moulded areas, ensuring all crevices are covered. Follow the manufacturer’s instructions regarding drying time before proceeding to paint.

Step 4: Repair Any Wall Damage

Before painting, inspect the wall for any damage caused by mould or moisture. Repairing these areas is crucial to achieving a smooth finish.

  • Filling Holes and Cracks: Use a high-quality filler or spackling compound to fill any holes or cracks. Apply the filler with a putty knife and smooth it out to match the surrounding surface.
  • Sanding: Once the filler has dried completely, sand the area smooth using fine-grit sandpaper. This will ensure a seamless transition between the repaired area and the rest of the wall.
  • Cleaning Dust: After sanding, wipe down the area with a damp cloth to remove any dust particles before painting.

Step 5: Choose the Right Paint

Selecting the right paint is critical to achieving a durable and beautiful finish.

  • Moisture-Resistant Paint: Look for paint specifically formulated for bathrooms or high-humidity areas. These paints typically contain mould inhibitors and are designed to withstand moisture.
  • Finish Options: Consider the finish you want. Satin and semi-gloss finishes are popular for bathrooms, as they are more moisture-resistant and easier to clean than flat finishes.
  • Color Selection: Choose a color that complements your bathroom’s overall design. Light colors can make a small space feel larger, while darker shades can add drama and warmth.

Step 6: Prepare for Painting

Preparation is key to a successful painting project. Take the time to set up your workspace properly.

  • Protect Surrounding Areas: Use painter’s tape to mask off areas you don’t want to paint, such as trim, fixtures, and adjacent walls. Lay down drop cloths to protect the floor from paint splatters.
  • Gather Your Tools: Make sure you have all necessary tools on hand, including brushes, rollers, a paint tray, and stir sticks. Having everything ready will streamline the painting process.

Step 7: Start Painting

Now that you’ve prepared the wall and gathered your supplies, it’s time to start interior painting.

  • Applying the First Coat: Begin by cutting in around the edges with a brush, painting the moulding and corners first. Then, use a roller to cover larger areas. Apply the paint evenly, ensuring full coverage.
  • Allow to Dry: Check the manufacturer’s instructions for drying times. Typically, you’ll need to let the first coat dry for a couple of hours before applying a second coat.
  • Second Coat: Once the first coat is dry, apply a second coat to ensure a rich, even color. Again, start with the edges and then fill in the larger areas.

Step 8: Allow to Cure

After painting, it’s essential to allow the paint to cure properly. This step helps the paint adhere and prevents issues down the line.

  • Curing Time: Check the paint can for the recommended curing time. Generally, it’s best to avoid using the bathroom for at least 24 hours after painting.
  • Ventilation: Ensure the bathroom is well-ventilated during the curing process to help the paint dry evenly.

Step 9: Regular Maintenance

To keep your newly painted bathroom walls looking their best, implement a regular maintenance routine.

  • Routine Cleaning: Wipe down walls with a damp cloth regularly to remove dust and moisture. Avoid harsh cleaners that can damage the paint.
  • Check for Mould: Periodically inspect the walls for any signs of mould or moisture. If you notice any, address it immediately to prevent further issues.
  • Humidity Control: Use exhaust fans during showers and baths to reduce humidity levels in the bathroom. This will help prevent mould growth and extend the life of your paint job.

Final Thoughts

Wahroonga Painting a moulded bathroom wall is a rewarding project that can transform your space. By following these detailed steps and taking the necessary precautions, you’ll ensure a beautiful and durable finish that enhances your bathroom’s appeal. Remember to assess and address any mould issues before painting, choose the right materials, and maintain your walls for long-lasting results. Enjoy your refreshed bathroom!